Have you ever wondered what happens when you combine the science of preservation with the irresistible sweetness of your favorite treats? Well, you’re in for a treat yourself because today, we will explore how to freeze dry candy. It’s like taking a trip to the candy factory right in your kitchen!
In this delightful journey, we’ll cover everything you need about freeze-drying candy. We’ll break down the process into simple steps, provide some tips and tricks, and even delve into the science behind it. So, grab your apron and get ready to embark on this sugary adventure!
The Sweet Science Behind Freeze-Drying
Before we dive into the practical aspects of freeze-drying candy, let’s take a moment to understand the science behind it. Freeze-drying is a preservation method that removes moisture from food without heat. It’s like magic for your food because it allows you to keep all the flavors, colors, and nutrients intact while extending the shelf life. But how does it work?
The Freeze-Drying Process
Imagine this: you have a bowl of your favorite candy, and you want to preserve it without losing its flavor or texture. Freeze-drying comes to the rescue! Here’s how it works in a nutshell:
- Freezing: First, the candy is frozen to a super low temperature. This freezes the water molecules inside the candy.
- Sublimation: The frozen candy is placed in a vacuum chamber. As the pressure decreases, the frozen water inside the candy goes through sublimation. Sublimation is when a substance changes directly from a solid to a gas without passing through the liquid state.
- Removal of moisture: The water vapor is removed from the vacuum chamber, leaving behind your candy in a freeze-dried state. Voila! Your candy is now light, crunchy, and perfectly preserved.
Why Freeze Dry Candy?
You might wonder, “Why should I bother freeze-drying candy when I can simply eat it?” Well, there are some pretty sweet reasons for doing so:
- Longer Shelf Life: Freeze-dried candy can last for months or even years when stored properly, making it perfect for emergency supplies or special occasions.
- Intense Flavor: The freeze-drying process locks in the candy’s flavor, so every bite is a burst of sweetness.
- Lightweight and Portable: Freeze-dried candy is lightweight and easy to carry, making it an ideal snack for hiking, camping, or just satisfying your sweet tooth on the go.
Now that we’ve got the science behind freeze-drying candy covered, let’s move on to the fun part: how to do it yourself!
Preparing Your Candy for Freeze-Drying
Gather Your Supplies
Before you can embark on your freeze-drying adventure, you’ll need to gather a few essential supplies. Don’t worry; you won’t need a fancy laboratory setup. Here’s what you’ll need:
- Candy of your choice: Pick your favorite candy or candies to freeze-dry. Whether it’s gummy bears, chocolate, or sour worms, the choice is yours!
- Freeze dryer: You’ll need access to a freeze dryer for this process. If you don’t own one, you might be able to rent or borrow one from a local kitchen equipment rental store or a friend.
- Freeze-drying trays: These are special trays designed for freeze-drying. Make sure you have enough trays for the amount of candy you plan to freeze-dry.
- Parchment paper: To prevent the candy from sticking to the trays, you’ll want to use parchment paper.
- Airtight containers: Once your candy is freeze-dried, you’ll need containers to store it in.
Preparing Your Candy
Now that you’ve got your supplies ready, it’s time to prepare your candy for the freeze-drying process. Here’s what you need to do:
- Sort and clean: Make sure your candy is free from any dust or debris. Sort through it to remove any damaged or discolored pieces.
- Cut or separate: Depending on the size and type of candy, you may want to cut it into smaller pieces or separate it into individual pieces. This helps with the freeze-drying process and ensures even drying.
- Arrange on trays: Place the parchment paper on your freeze-drying trays and evenly arrange the candy pieces on them. Leave some space between the pieces to allow for proper airflow.
With your candy neatly arranged on the trays, it’s time to move on to the next step: the freeze-drying process itself.
The Freeze-Drying Process
Loading the Freeze Dryer
Now that your candy is prepared and ready for action, it’s time to load it into the freeze dryer. Follow these steps:
- Insert trays: Carefully place your trays of candy into the freeze dryer. Ensure they fit snugly but aren’t too crowded, as you want adequate space for airflow.
- Seal the chamber: Close and seal the freeze dryer chamber securely. This is essential to create a vacuum environment for the sublimation process.
Starting the Freeze-Drying Process
Here’s where the magic happens! Follow these steps to start the freeze-drying process:
- Turn on the freeze dryer: Power it up and set it to the appropriate settings. The exact settings may vary depending on your machine and the type of candy you’re freeze-drying. Refer to the manufacturer’s instructions for guidance.
- Begin freezing: The freeze dryer will start by lowering the temperature inside the chamber. This freezes the water in the candy.
- Initiate sublimation: Once the candy is frozen, the machine will begin the sublimation process. During this phase, water vapor is removed from the chamber, leaving your candy freeze-dried.
Monitoring the Process
Freeze-drying candy requires some patience and vigilance. You’ll want to keep an eye on the process to ensure everything is going smoothly:
- Check the progress: Periodically check on your candy to see how it’s doing. You can open the chamber to take a peek without interrupting the process, but be quick to minimize moisture exposure.
- Adjust settings if needed: If you notice any issues, such as uneven drying or condensation, you may need to adjust the freeze dryer’s settings. Consult the machine’s manual for guidance on troubleshooting.
- Be patient: Depending on the type and quantity of candy, freeze-drying can take several hours to a couple of days. It’s a slow and steady process, but the results are worth the wait.
The Art of Storing Freeze-Dried Candy
Congratulations! You’ve successfully freeze-dried your candy, and now it’s time to savor the rewards. But before you indulge in those crunchy, flavorful morsels, you must know how to store them properly to maintain their quality.
Packaging Your Freeze-Dried Candy
Here’s how to package and store your freeze-dried candy like a pro:
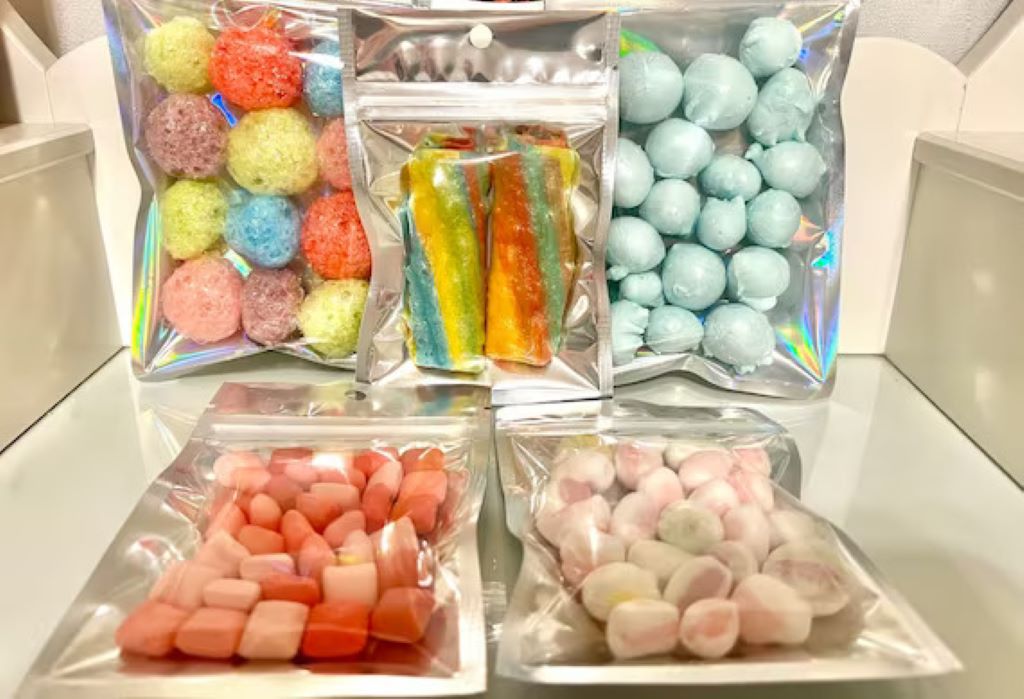
- Use airtight containers: Transfer your freeze-dried candy into airtight containers. Mason jars, vacuum-sealed bags, or food-grade plastic containers with tight-fitting lids work well.
- Avoid moisture: Moisture is the enemy of freeze-dried food. To prevent moisture from sneaking in, consider adding a desiccant packet or an oxygen absorber to the container. These help maintain the dry environment.
- Label and date: Don’t forget to label your containers with the type of candy and the date of freeze-drying. This will help you keep track of freshness.
- Store in a cool, dark place: Keep your containers in a cool, dark, and dry place. Ideally, your freeze-dried candy should be stored at temperatures below 70°F (21°C).
- Limit exposure to air: When you open a container to enjoy some candy, reseal it promptly to prevent moisture and oxygen from getting in.
Shelf Life of Freeze-Dried Candy
One of the fantastic benefits of freeze-drying candy is its extended shelf life. When stored properly, freeze-dried candy can last from several months to several years. Here’s a rough estimate:
- Hard candy: Can last up to 2 years or more.
- Gummy candy: Typically has a shorter shelf life of 6 months to 1 year due to its higher moisture content.
- Chocolate: Can last up to 1 year or more, depending on the type and how well it’s stored.
Remember that these are general guidelines, and the actual shelf life may vary based on the specific candy, storage conditions, and how well it was freeze-dried.
Tips and Tricks for Freeze-Drying Success
Now that you’re well on your way to becoming a freeze-drying expert, let’s explore some additional tips and tricks to ensure your candy turns out perfectly every time.
Experiment with Flavors
Why stop at just one type of candy? Freeze-drying allows you to experiment with different flavors and combinations. You can mix and match candies to create unique blends or even add a dash of spices or flavored extracts to enhance the taste.
For example, try freeze-drying cinnamon candies for a spicy kick or mix gummy bears with sour gummy worms for a sweet and tangy treat. The possibilities are endless, and you control your candy creations!
Get Creative with Presentation
Freeze-dried candy isn’t just delicious; it can also be visually stunning. Get creative with how you present your freeze-dried treats. Here are some ideas:
- Candy bouquets: Arrange your freeze-dried candy on sticks or skewers to create colorful and edible bouquets.
- Gift jars: Fill decorative jars with an assortment of freeze-dried candies and give them as unique and personalized gifts.
- Candy art: Use freeze-dried candy to create edible artwork or even 3D sculptures. It’s like crafting with candy!
Mix with Other Foods
Freeze-dried candy isn’t limited to being a standalone snack. You can incorporate it into various dishes and desserts to add a delightful crunch and burst of sweetness. Here are a few ideas:
- Trail mix: Combine freeze-dried candy with nuts, dried fruits, and seeds to create your custom trail mix.
- Yogurt and cereal toppers: Sprinkle freeze-dried candy over your morning yogurt or cereal for an extra flavor and texture.
- Ice cream topping: Crush freeze-dried candy and use it as a unique ice cream topping for a delightful contrast in texture.
Rehydrating Freeze-Dried Candy
If you ever find yourself missing the chewy texture of your favorite candy, don’t fret! You can rehydrate freeze-dried candy to bring back some of its original softness. Simply place the freeze-dried candy in a container with a lid and add a small amount of water. Seal the container and let it sit for a few hours or overnight, and your candy will absorb the moisture and regain some of its chewiness.
However, remember that rehydrated candy won’t return to its original state entirely, but it’s a fun way to experience a different texture.
Frequently Asked Questions (FAQs)
FAQ 1: Can I freeze-dry homemade candy?
Absolutely! You can freeze-dry homemade candy just like store-bought candy. Just make sure your homemade candy is prepared and stored properly before freeze-drying.
FAQ 2: How do I know when the candy is fully freeze-dried?
The candy is fully freeze-dried when it’s light, crispy, and all the moisture has been removed. You can test it by breaking a piece; it should snap easily. If it’s still chewy or feels soft, it needs more time in the freeze dryer.
FAQ 3: Can I freeze-dry candy with fillings like caramel or nougat?
Yes, you can freeze-dry candy with fillings, but it might require a bit of experimentation. The fillings can affect the freeze-drying process, so be prepared for some variations in texture and consistency.
FAQ 4: Can I freeze-dry sour candies or candies with a coating?
Sour candies and candies with coatings can be freeze-dried, but the freeze-drying process may alter their texture and flavor. Some sour candies may lose their sourness, while coated candies might become less crunchy.
FAQ 5: Can I freeze-dry sugar-free candy?
Yes, you can freeze-dry sugar-free candy, but remember that sugar substitutes can have different properties than regular sugar. The texture and flavor of sugar-free candy after freeze-drying may vary, so it’s a good idea to test a small batch first.
Conclusion
The fascinating and mouth-watering journey of freeze-drying candy has come to an end. We’ve explored the science behind it, learned how to prepare and store our candy, and even discovered some creative ways to enjoy it.
But this is only the beginning! Whether you’re debating the healthiness of a fruit or yogurt dinner or looking to extend the shelf life of your favorite treats, create unique candy blends, or add a crunchy twist to your dishes, freeze-drying candy opens up a world of possibilities. So, roll up your sleeves, put on your candy-making hat, and embark on your own freeze-drying adventure.
Who knows what delicious creations you’ll come up with? One thing is for sure, your taste buds will thank you for it!

