Here’s the truth. You can bake excellent sourdough at home using simple ingredients, a predictable schedule, and one reliable method. No bakery experience required.
This guide removes confusion step by step. You will learn how sourdough works, how to prepare a starter, how to ferment dough properly, and how to bake a crisp crust with a soft interior. Everything is explained clearly so you can succeed on your first attempt.
What Is the Easiest Way to Make Sourdough Bread at Home?
To make sourdough bread at home, create or obtain an active starter, mix flour, water, salt, and starter, allow bulk fermentation, shape the dough, proof it slowly, then bake in a preheated covered pot. Careful timing and hydration control produce a crisp crust and airy crumb.
Many beginners fail because they skip structure. Sourdough baking depends on process consistency, not guesswork.
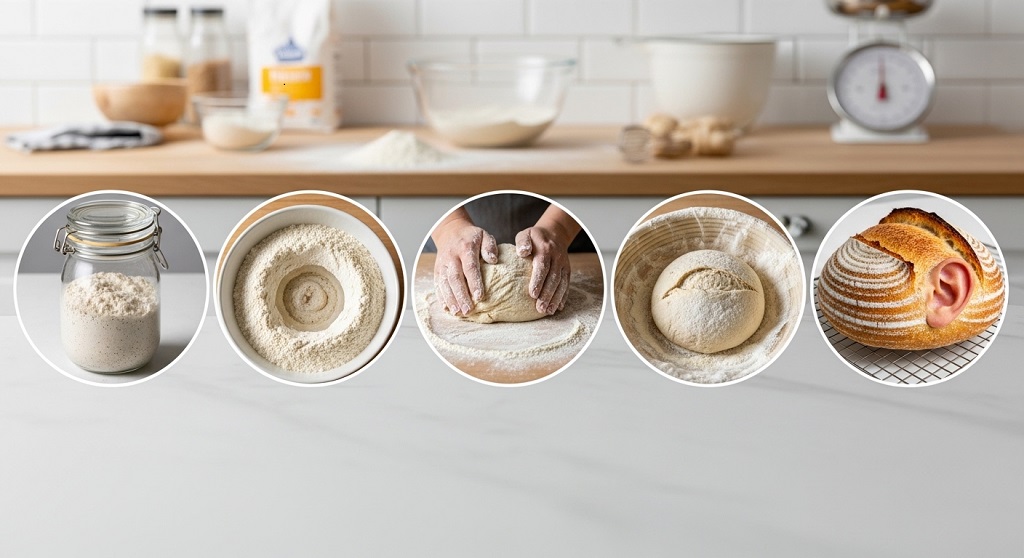
The easiest workflow looks like this:
- Feed an active sourdough starter
- Mix dough ingredients
- Rest and stretch the dough
- Bulk ferment for structure
- Shape and cold-proof overnight
- Bake in a hot covered pot
This sequence works because fermentation builds strength naturally. Commercial yeast works faster. Sourdough works deeper.
Natural fermentation improves flavor, digestion, and texture. Wild yeast and bacteria create organic acids that strengthen gluten networks slowly.
Once you understand fermentation timing instead of watching the clock blindly, sourdough becomes predictable.
What Ingredients Do Beginners Need for Sourdough Bread?
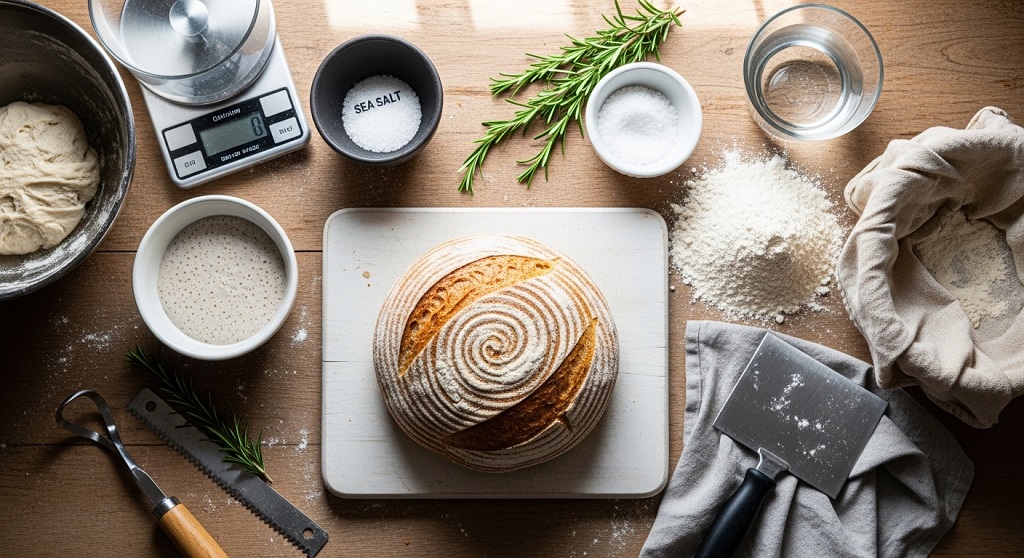
Beginner sourdough bread requires only four ingredients: flour, water, salt, and active sourdough starter. Use strong bread flour for structure, filtered water for fermentation stability, fine salt for flavor balance, and a bubbly starter to ensure reliable rise and crumb development.
Sourdough baking succeeds because of ingredient quality, not ingredient quantity.
Here are the core ingredients explained:
- Flour builds gluten strength. Bread flour works best.
- Water hydrates proteins and activates enzymes.
- Salt controls fermentation speed and improves flavor.
- Starter replaces commercial yeast completely.
Avoid using chlorinated tap water if possible. Chlorine weakens fermentation activity.
Many beginners experiment with whole wheat flour too early. Start with 90–100% bread flour for consistent results.
Once comfortable, you can blend flours to improve flavor complexity.
How Do You Make a Sourdough Starter from Scratch?
A sourdough starter forms by mixing flour and water daily for 5–7 days until natural wild yeast colonizes the mixture. Regular feeding strengthens fermentation activity, producing bubbles, aroma, and expansion. A mature starter doubles in size within four hours after feeding.
Your starter is the engine of sourdough bread.
Without a strong starter, dough will not rise correctly.
Follow this simple schedule:
- Day 1: Mix flour and water
- Day 2: Add fresh flour and water
- Day 3: Expect small bubbles
- Day 4–5: Notice sour aroma
- Day 6–7: Starter doubles reliably
Consistency matters more than precision.
Feed your starter at the same time daily. Maintain equal flour-to-water ratios by weight. Store at room temperature during development.
When ready, your starter should:
- Smell mildly sour
- Show visible bubbles
- Double within four hours
- Float in water (optional test)
This signals strong fermentation activity.
What Tools Are Helpful for Baking Sourdough Bread at Home?
Essential sourdough tools include a mixing bowl, kitchen scale, bench scraper, proofing basket, and Dutch oven. While optional, these tools improve shaping accuracy, fermentation control, and crust development by maintaining consistent hydration ratios and trapping steam during baking.
You do not need professional bakery equipment.
However, a few tools increase success rate dramatically.
| Tool | Purpose | Required? |
|---|---|---|
| Digital scale | Accurate ingredient ratios | Yes |
| Dutch oven | Steam retention for crust | Yes |
| Bench scraper | Easy dough handling | Helpful |
| Proofing basket | Improves shape structure | Optional |
| Lame blade | Controls oven spring expansion | Optional |
The Dutch oven matters most. It traps steam during early baking. Steam creates crust expansion.
If unavailable, use a baking tray with a steam pan underneath.
How Do You Mix and Ferment Sourdough Dough Properly?
Proper sourdough fermentation begins by mixing flour, water, starter, and salt into a hydrated dough, followed by rest periods and stretch-and-fold cycles. Bulk fermentation continues until the dough increases about 50 percent in volume and shows bubbles across the surface.
This stage determines crumb texture.
Follow this reliable mixing structure:
- Combine flour and water first
- Rest 30 minutes (autolyse stage)
- Add starter and salt
- Mix thoroughly
- Perform stretch-and-fold every 30 minutes
Stretching strengthens gluten without kneading.
Bulk fermentation lasts 4–6 hours depending on temperature.
Look for these visual signs instead of relying on time:
- Dough feels lighter
- Surface becomes smoother
- Edges show bubbles
- Volume increases noticeably
Under-fermented dough produces dense bread. Over-fermented dough collapses during baking.
Observation replaces guesswork.
How Do You Shape and Proof Sourdough for the Best Rise?
Sourdough shaping creates surface tension that supports oven spring. After bulk fermentation, gently shape the dough into a tight round or oval, place it seam-side up in a proofing basket, and refrigerate 8–16 hours for slow fermentation and stronger flavor.
Shaping controls final structure.
Poor shaping leads to flat loaves.
Use this shaping method:
- Turn dough onto floured surface
- Fold edges toward center
- Flip dough upside down
- Rotate to tighten surface
- Transfer into proofing basket
Cold proofing improves flavor complexity.
It also strengthens scoring results before baking.
Refrigeration slows fermentation but increases acidity balance. This produces classic sourdough taste.
How Do You Bake Sourdough Bread with a Crispy Crust?
Bake sourdough bread in a preheated Dutch oven at 230°C (450°F) for 20 minutes covered, then 20 minutes uncovered. The covered stage traps steam for expansion, while the uncovered stage browns the crust and completes internal structure formation.
Steam creates oven spring.
Without steam, crust hardens too early.
Follow this baking sequence:
- Preheat oven and Dutch oven for 45 minutes
- Transfer dough carefully
- Score surface with sharp blade
- Bake covered 20 minutes
- Bake uncovered 20 minutes
Internal bread temperature should reach 96°C (205°F).
Allow bread to cool at least one hour before slicing.
Cutting too early releases steam and ruins texture.
What Common Mistakes Should Beginners Avoid When Making Sourdough?
Beginners often fail sourdough bread by using weak starter culture, skipping bulk fermentation signs, over-handling dough, baking in a cold oven, or slicing bread too early. Correcting these mistakes dramatically improves rise, crumb structure, and crust consistency.
Most sourdough problems follow predictable patterns.
Watch for these mistakes:
- Starter not fully active
- Dough too wet to handle
- Fermentation too short
- Over-proofing overnight
- No steam during baking
Fixing fermentation timing solves most beginner failures.
Track temperature carefully. Warmer kitchens speed fermentation. Cooler kitchens slow it.
Adjust expectations accordingly.
How Long Does It Take to Make Sourdough Bread from Start to Finish?
Making sourdough bread takes about 24 hours total, including starter feeding, dough mixing, bulk fermentation, shaping, overnight cold proofing, and baking. Active work requires only 45–60 minutes, while the remaining time allows natural fermentation to develop structure and flavor.
Sourdough baking is slow but not difficult.
Here is a realistic timeline:
- Starter feeding: morning
- Dough mixing: afternoon
- Bulk fermentation: 4–6 hours
- Cold proofing: overnight
- Baking: next morning
This schedule fits easily into daily routines.
Consistency matters more than speed.
Conclusion: Can Anyone Really Make Sourdough Bread at Home Successfully?
Sourdough baking looks complicated until you understand fermentation timing, starter strength, and shaping technique. Once those elements become familiar, results become predictable.
You only need flour, water, salt, and patience.
Start with one reliable method. Repeat it several times. Avoid changing hydration levels early. Focus on recognizing dough behavior instead of chasing perfect timing charts.
Each loaf improves your intuition.
If you begin today, your first successful sourdough loaf can happen within a week. Save this guide, follow the steps carefully, and bake consistently. Your kitchen can produce bakery-quality bread without specialized training.
Try your first loaf this week and build your own fermentation routine.
Frequently Asked Questions About Sourdough Bread
Why is my sourdough bread dense inside?
Dense sourdough usually results from weak starter activity or under-fermentation during bulk rise. Ensure your starter doubles within four hours after feeding and allow dough to expand at least 50 percent before shaping.
Can I make sourdough without a Dutch oven?
Yes. Use a baking stone or tray and place a pan of hot water inside the oven to create steam. Steam helps crust expansion during the first 20 minutes of baking.
How often should I feed my sourdough starter?
Feed daily at room temperature if baking frequently. If storing in the refrigerator, feed once weekly and refresh before baking.
What flour works best for sourdough beginners?
Bread flour works best because of its higher protein content. Strong gluten improves structure, fermentation tolerance, and oven spring.
Can sourdough bread rise overnight?
Yes. Cold proofing overnight in the refrigerator improves flavor and strengthens dough structure while preventing over-fermentation.
Why does sourdough taste sour?
Natural bacteria produce lactic and acetic acids during fermentation. Longer proofing increases acidity and deepens flavor complexity.
How do I know when sourdough is fully baked?
Fully baked sourdough reaches an internal temperature of about 96°C (205°F) and produces a hollow sound when tapped underneath.
Read More Also: Traditional Scottish Food Recipes Passed Through Generations
Learn More: How Many Days Can a Betta Fish Stay Without Food?